

Wildlife Tracks Identification: Quick Field Rules & Tools

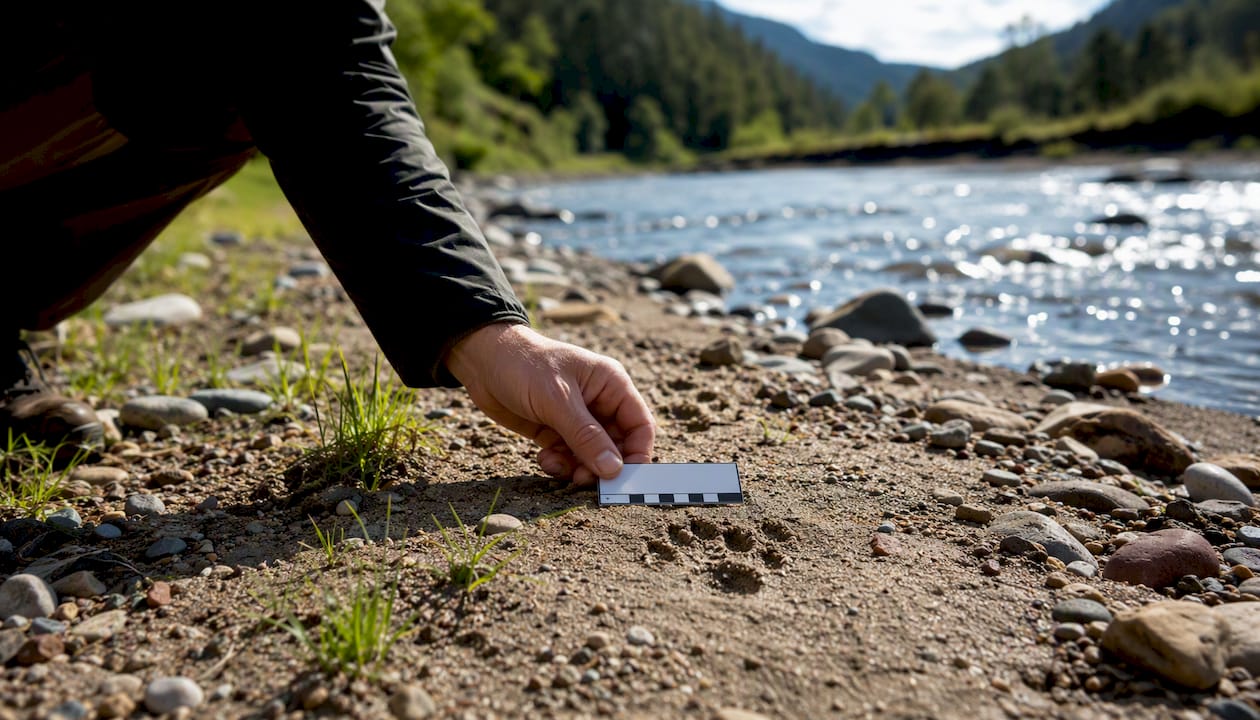
You can narrow almost any print to a handful of likely animals in under two minutes. Measure the length and width, count the toes, read the gait pattern, check the habitat, and document what you find with a scale object in the frame. That five-step workflow is the backbone of reliable animal track identification, and everything else in this guide builds on it.
Quick field checklist:
Measure track length and width (use a ruler, coin, or folded business card as scale)
Count toes and note claw marks, pad shape, or hoof outline
Step back and read the gait pattern across at least three consecutive prints
Check habitat and region to narrow likely species
Photograph with a scale object, then record notes in a notebook or phone
Guidance from NMSU, the U.S. Fish & Wildlife Service, and certified tracker resources all converge on the same starting point: measure first, then interpret.
Key Takeaways
Reliable wildlife tracks identification comes down to measuring consistently, reading gait patterns across multiple prints, and using substrate-aware judgment before naming a species.
Point | Details |
Measure before interpreting | Record length, width, stride, and straddle before attempting any species ID. |
Gait beats a single print | Trail patterns across three or more prints are more diagnostic than one footprint alone. |
Substrate distorts size | Snow and mud enlarge prints; measure snow tracks at the bottom of the depression. |
Group ID first | Narrow to canine, feline, ungulate, or rodent before attempting species-level calls. |
Document with scale | Always photograph with a coin or ruler in frame; record GPS coordinates and substrate type. |
Table of Contents
Wildlife tracks identification starts with these core measurements
Before you try to name a species, collect the raw data. A track without measurements is just a guess.
The four numbers that matter most:
Track length: Measure from the back of the heel pad to the tip of the longest toe. Include the heel only if it registers clearly.
Track width: Measure across the widest point of the print.
Stride: The distance from one print to the next print made by the same foot. Longer strides suggest faster movement or larger animals.
Straddle: The total width of the trail from the outside edge of the left prints to the outside edge of the right prints. A narrow straddle often indicates a lean, fast-moving animal; a wide one suggests a stocky build.
NMSU circular CR561 provides scaled drawings for common North American species alongside these exact measurement protocols, making it one of the most practical free references available.
Print anatomy to note beyond size:
Toe count (front vs. rear feet often differ)
Presence or absence of claw marks (felines retract claws; canines do not)
Pad shape: round, elongated, lobed, or heart-shaped
Webbing between toes (beaver, otter, many waterfowl)
Tail drags, belly drags, or scuff marks in the substrate
Hoof shape: split (deer, elk) vs. solid (horse)
Essential field tools: a small ruler or folding scale, a coin (a quarter works perfectly as a size reference), a notebook, a phone or camera, and a compass or GPS. For documentation tips that go beyond tracking, Thrillofit’s guide on documenting outdoor adventures covers field notes and photo habits worth building.
Pro Tip: Carry two business cards in your field kit. Lay one beside the track for scale in photos, and use the other to sketch the print outline and note measurements on the spot. They weigh nothing and survive most weather.
For photos, shoot straight down from directly overhead first, then take one oblique shot at a low angle to show depth and edge detail. Always include the scale object in both frames.
How to read gait patterns and what they tell you
A single perfect print is rare. A trail of ten prints is a story. The Missouri Department of Conservation makes the point plainly: gait and the repeating trail pattern are often more diagnostic than any individual footprint.
The five gaits you’ll encounter most often:
Walk: Diagonal limb pairs move together; prints appear in a roughly alternating line. Deer, bears, and raccoons commonly walk.
Trot: Faster diagonal movement; prints often pair up or fall in a tight zigzag. Coyotes and foxes trot frequently, leaving evenly spaced, nearly straight trails.
Bound/gallop: Front feet land together, then rear feet land ahead of them. Squirrels, rabbits, and weasels use this pattern. The result looks like paired clusters of four prints.
Hop: Similar to bound but with the rear feet landing side by side behind the front feet. Classic rabbit and hare pattern.
Direct register: The rear foot lands almost exactly in the front foot’s print, leaving what looks like a two-print trail. Foxes and mountain lions do this routinely, which is one reason fox tracks can fool beginners into thinking they belong to a much smaller animal.
Measuring stride and straddle in the field:
Pick three consecutive prints from the same foot and measure the distance between the first and third, then divide by two. That average stride is more reliable than a single measurement. For straddle, measure across the full trail width at its widest point.
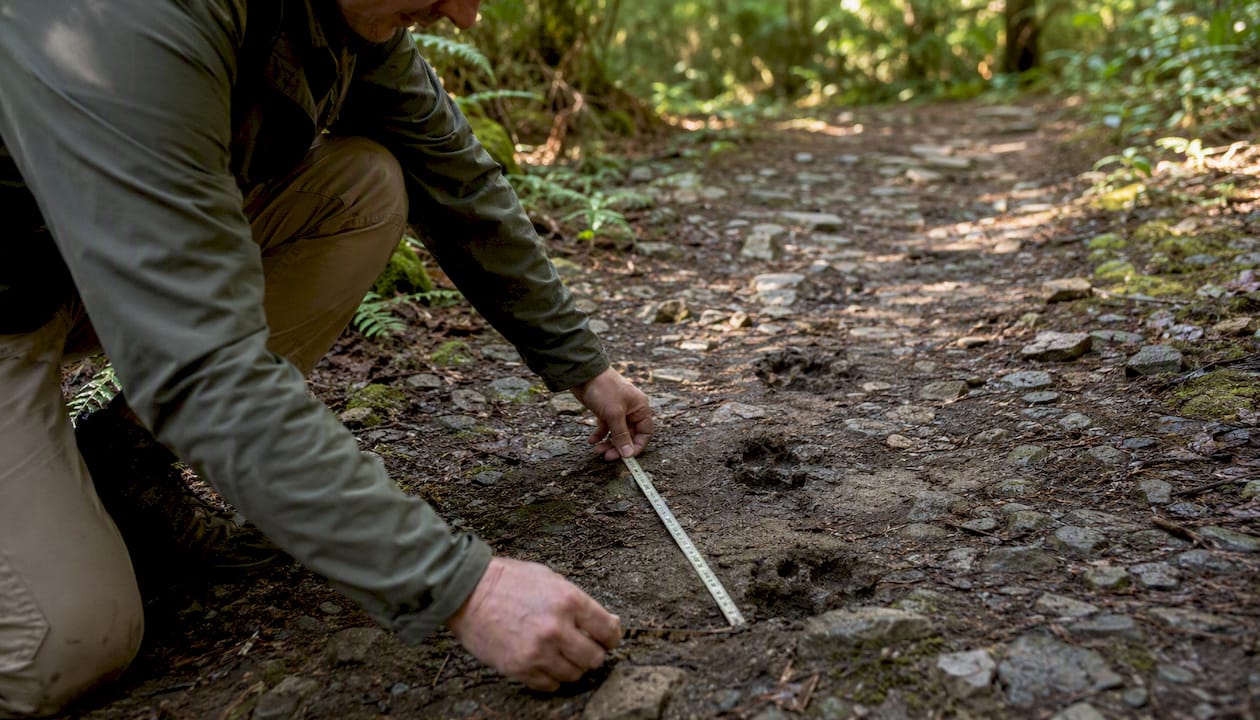
A narrow straddle combined with a long stride usually points to a lean, fast mammal. A wide straddle with a short stride suggests something low-slung, like a badger or opossum.
Practical exercise: On your next hike, find any trail and record three stride measurements before you try to name the animal. That habit alone will sharpen your ID accuracy faster than memorizing species silhouettes.
Identifying tracks by animal group: key markers and size ranges
Most North American tracks fall into six groups. Learn the group first, then narrow to species.
The New Hampshire track card lists representative size ranges for common species and explicitly notes that substrate and movement speed both alter apparent size. Use those ranges as starting points; they are not hard cutoffs.
Canines (dogs, coyotes, foxes, wolves)
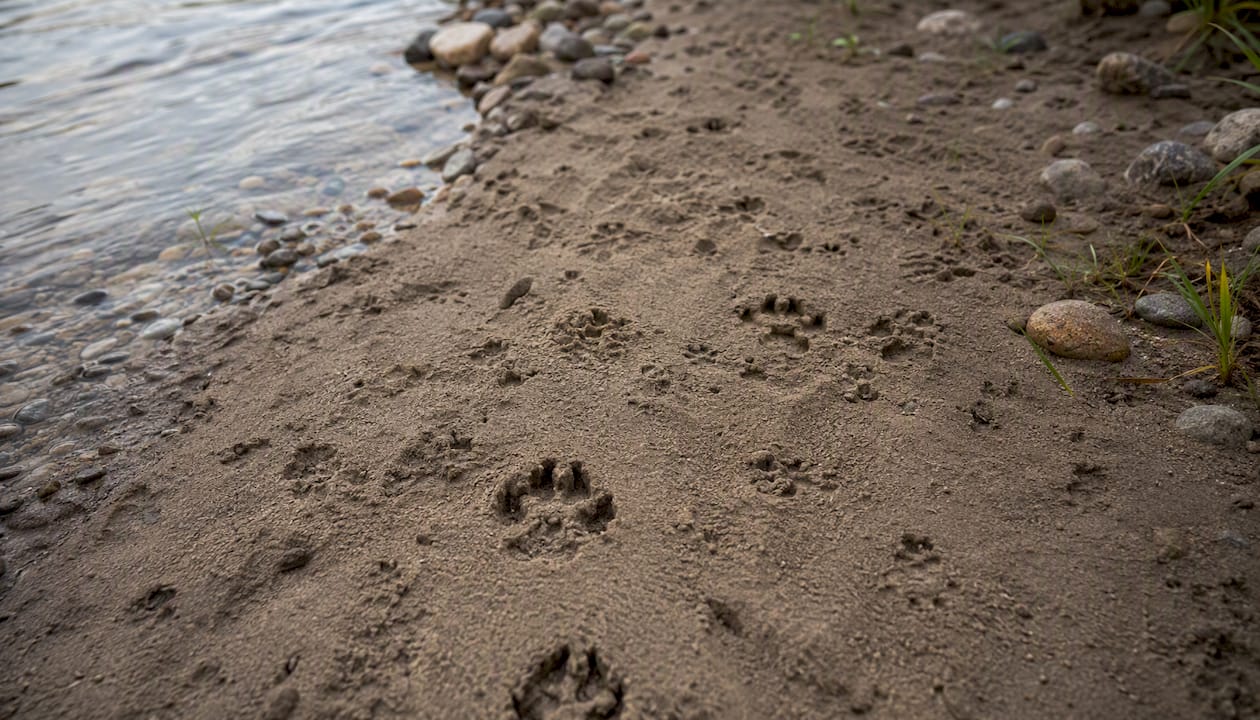
Four toes on front and rear, with visible claw marks. Oval overall shape. Coyote tracks typically run a few inches long; red fox tracks are smaller and often show a distinctive chevron-shaped central pad. Domestic dogs vary widely but tend to have rounder, sloppier prints with splayed toes (size varies). The trot pattern of a coyote is almost perfectly straight, like a line of evenly spaced dots. A dog’s trail wanders.
Felines (bobcat, mountain lion, house cat)
Four toes, no claw marks in most prints, and a large, three-lobed heel pad. Bobcat tracks are moderate-sized; mountain lion tracks are larger and can look like a large dog until you notice the absent claws and rounder shape. House cat tracks are much smaller. Direct register is common across all felines.
Omnivores and mid-sized carnivores (raccoon, opossum, skunk, bear)
Raccoon tracks have five toes on all feet and look almost hand-like. Black bear tracks are much larger with a big heel pad and claw marks. Opossum tracks show five toes with a distinctive opposable rear “thumb” print, and skunk tracks are smaller with short claws.
Rodents (squirrels, mice, beaver, muskrat)
Squirrels bound, leaving four-print clusters; front feet are small, rear feet noticeably larger. Beaver rear feet are webbed and quite large, often accompanied by a tail drag mark. Mice leave tiny paired prints with a thin tail drag line.
Ungulates (white-tailed deer, elk, moose, pronghorn)
Split hooves leave a heart-shaped or pointed two-toed print. White-tailed deer tracks are medium-sized with pointed tips. Elk tracks are larger and more rounded. Moose tracks are very large and elongated. Dewclaw impressions may appear in soft substrate or during running.
Birds
Three forward-pointing toes with a small rear toe (most songbirds and shorebirds). Raptors leave deeper, wider impressions with curved claw marks. Turkey tracks are distinctive with three long forward toes and often have a drag mark from the rear toe.
Animal Group | Key Marker |
Coyote | Tracks a few inches long, straight trot trail, visible claws |
Bobcat | Moderate-sized tracks, no claws, 3-lobed heel pad |
Raccoon | Hand-like print with five toes |
White-tailed deer | Split hoof with pointed tips |
Eastern gray squirrel | Small bounding clusters of prints |
Black bear | Large tracks with big heel pad, claws visible |
Common confusions and how to separate them:
Dog vs. coyote: check the trail pattern. A coyote trots in a nearly straight line; a dog meanders. Coyote pads are also more compact.
Bobcat vs. large house cat: size and habitat. A bobcat track over 2 inches in a wild area is almost certainly not a house cat.
Fox vs. small dog: look for the chevron pad shape and direct register in fox tracks. Small dogs rarely direct-register.
How substrate changes what you see in a track
The same animal leaves a different-looking print in snow, mud, sand, and hard-packed dirt. Knowing how each substrate distorts a track keeps you from misidentifying a common species as something exotic.
Snow: Prints expand as snow melts and refreezes around the edges. A coyote track can look wolf-sized by mid-afternoon on a sunny day. The USFWS snow-track guidance describes species-specific snow characteristics, including how raccoon toe impressions spread in soft snow. Always measure at the bottom of the depression, not at the surface edge, as NMSU CR561 specifies. Surface measurements pick up drift and collapse, not the actual foot size.
Mud: Soft mud captures fine detail beautifully but also causes toes to splay and pads to spread under the animal’s weight. Tracks in deep mud often look larger than the animal’s true foot size.
Sand: Dry sand crumbles at the edges, softening detail and making toe separation hard to read. Damp compacted sand near water is the best substrate for clean prints.
Hard-packed ground or leaf litter: Only the deepest-pressing parts of the foot register, often just the toe tips and the heel. You may see only a partial print with no pad detail at all.
Substrate-specific tips:
In snow, look for the clearest print in a shaded spot where melt is slowest.
In mud, find prints on the firmer bank edge rather than the soft center.
On hard ground, look for scuff marks, disturbed debris, or partial impressions near softer patches.
Track age: fresh prints have crisp edges and no debris inside; older ones show crumbling edges, frost crystals in winter, or dried mud cracks.
Pro Tip: Press your own boot into the same substrate next to the track you’re measuring. That fresh comparison print tells you how much the material spreads and compresses under weight, giving you an instant calibration for the animal’s print size and approximate age.
Field safety, ethical tracking, and when to report what you find
Tracking takes you into habitat where animals live, feed, and raise young. A few habits keep you safe and keep the wildlife undisturbed.
Safety checklist before you head out:
Tell someone your route and expected return time
Carry a map, compass, or GPS (phone GPS fails without signal; a paper map does not)
Stay aware of your surroundings, especially near dense cover or water
If tracks suggest a large predator nearby, review Thrillofit’s bear encounter guidance and the broader wildlife encounter guidelines before continuing
Know your exit route
The Old Farmer’s Almanac tracking guide reinforces these basics: inform someone of your plans, carry navigation tools, and maintain situational awareness throughout.
Ethical field rules:
Leave the habitat exactly as you found it. Don’t clear brush or create paths to get closer to a den or nest.
Don’t handle, move, or disturb physical evidence unless you’re working with a licensed researcher.
Avoid repeated visits to active den sites; your scent and presence can cause animals to abandon young.
When and how to report:
If you find signs of an injured animal, evidence of poaching or illegal activity, or tracks from a species listed as threatened or endangered, report it. Contact your state wildlife agency first. For federal species, the U.S. Fish & Wildlife Service handles reports at fws.gov. Document everything before you leave: photos with scale, GPS coordinates, substrate type, and track measurements. That data is genuinely useful to wildlife managers.
Tracking is observation, not intervention. The best thing you can do for most animals is record what you see and leave without a trace.
The best tools and resources for tracking wildlife footprints in the U.S.
You don’t need expensive gear to get started. A laminated track card, a small ruler, and your phone cover most situations.
Printable and physical track cards:
New Hampshire Fish & Game track card PDF: compact pocket guide with size ranges for common northeastern species.
Princeton Outdoor Action animal tracking cards: beginner-friendly printable cards covering common U.S. species.
State wildlife agency pages (MassWildlife, for example) often publish free regional track cards with toe-count patterns and habitat notes.
Apps for track ID from photos:
Apps like iNaturalist let you photograph a track and submit it to a community of naturalists for ID. The crowdsourced model is slower than an instant AI answer but far more accurate for ambiguous prints. Fully automated photo-ID apps for tracks exist, but they struggle with partial prints, unusual substrates, and juvenile animals. Use them as a starting hypothesis, not a final answer.
Building a minimal field kit:
A quarter (for scale), a folding ruler, a laminated track card, a small notebook, and a phone with offline photos of common regional tracks. That’s it. The ICWDM tracking identification page is worth bookmarking for its group-by-group ID markers, accessible from a phone with signal.
Pro Tip: Make a dedicated scale card: tape a quarter, a dime, and a 1-inch mark onto a laminated index card. Every photo you take in the field will have a consistent, known reference, which makes comparing prints across different outings much easier.
Expert tracking practices that actually build skill
Knowing the rules is one thing. Getting good at reading tracks in the field is a different skill, and it comes from deliberate practice.
Certified tracker Kim Cabrera’s core teaching, cited by Outdoor Life, is worth internalizing: learn to recognize the presence of a track before you try to name the species. That sounds obvious until you’re standing in leaf litter trying to decide if a smudge is a print at all. Recognition comes first. Species ID comes after.
Practice exercises that work:
Track pad drill: Fill a shallow tray with damp sand or soft soil. Let local animals walk through it overnight. Measure and photograph every print the next morning before looking anything up.
Stride recording habit: On any hike, pick one trail and record three stride measurements before you attempt an ID. Over a season, your eye for gait calibrates quickly.
Track with a partner: One person calls out observations; the other writes them down without commenting. Comparing notes afterward reveals what each person missed and what they assumed.
How experienced trackers handle ambiguous evidence:
They don’t force a species call. When a print is degraded, partial, or in a confusing substrate, a skilled tracker labels it by group (“canid, medium-sized”) and collects supporting clues: scat, hair, feeding signs, nearby habitat. Perfect tracks are rare, as Outdoor Life notes. Treating every print as one piece of a larger puzzle, rather than a standalone ID problem, is what separates a careful observer from someone who guesses and moves on.
Pro Tip: Keep a dedicated tracking journal separate from your general field notes. Date each entry, note the substrate and weather, and sketch the print outline alongside your measurements. After a dozen outings, patterns emerge that no app or book will show you.
Why tracking matters more than most people realize
Tracks are one of the few ways you get to see an animal’s behavior without the animal knowing you’re there. A set of deer prints crossing a frozen creek at dawn, a raccoon’s hand-like impressions circling a campsite, a bobcat’s clean direct-register trail along a ridge: each one is a record of a decision an animal made, often hours before you arrived.
What I find undervalued in most tracking guides is the observational discipline the practice builds. You start noticing things you walked past for years: a subtle depression in leaf litter, a scuff mark on a muddy bank, a pattern in the snow that resolves into a story once you slow down and look. That shift in attention carries over into every other aspect of field craft, from reading terrain to anticipating weather.
Use this guide as a field reference, not a one-time read. The measurement rules and gait patterns here are the same ones wildlife biologists use; the difference is repetition. For building the broader field skills that make tracking safer and more productive, Thrillofit’s resources on outdoor navigation and wilderness self-rescue are worth reading alongside this guide.
Sources
The sources below are the primary references used throughout this guide. Each covers a distinct aspect of track identification.
Recommended
Comments