

Survival Cache Planning: Build Your Bug-Out Supply Network

TL;DR:
Survival cache planning involves strategically pre-positioning essential supplies along your route to maintain mobility and resource access. Proper site selection, container choice, and regular maintenance ensure caches remain effective during extended emergencies or bug-outs. Spacing caches at two-day intervals and distributing them across multiple sites reduce risks and improve resilience.
Survival cache planning is the practice of pre-positioning essential supplies in hidden, strategic locations along your route so you can move fast and light without sacrificing what you need to survive. The core idea comes directly from military logistics doctrine: carry a minimal base load, then resupply from pre-staged caches as you move. This approach solves one of the biggest problems in any bug-out or extended wilderness scenario. Carrying heavy, long-term supplies from the start causes fatigue and slows movement when speed matters most. A well-built cache network keeps you mobile, fed, and equipped without breaking your back on day one.
What is survival cache planning and why does it matter?
Survival cache planning is defined as the deliberate process of selecting locations, preparing containers, stocking supplies, and documenting sites so you can reliably recover resources under stress. The industry term used by military and preparedness professionals is “supply caching,” and the civilian application follows the same logic. You are not just burying a box of gear. You are building a logistics network that supports your movement over days or weeks.
The one-bag philosophy sits at the heart of this system. Your primary bag carries only what you need for the first 24–48 hours. Pre-positioned consumables along your route handle everything beyond that. This keeps your pack weight manageable and your pace sustainable. Thrillofit covers this principle across its survival content because it applies equally to a three-day wilderness trip and a full-scale evacuation scenario.
The planning side of caching is where most people underinvest. Picking a random spot and burying a bag is not a cache strategy. Effective planning accounts for terrain, route variants, seasonal access, and the realistic stress conditions under which you will need to retrieve the cache.
What goes into a survival cache: containers, contents, and prep?
Container choice determines how long your cache survives in the ground. The three most common options are PVC pipe sections, military surplus ammo cans, and hard-sided waterproof cases. DIY cache containers range from inexpensive PVC pipes to more durable military surplus ammo cans, depending on how long you plan to leave them buried and in what climate.
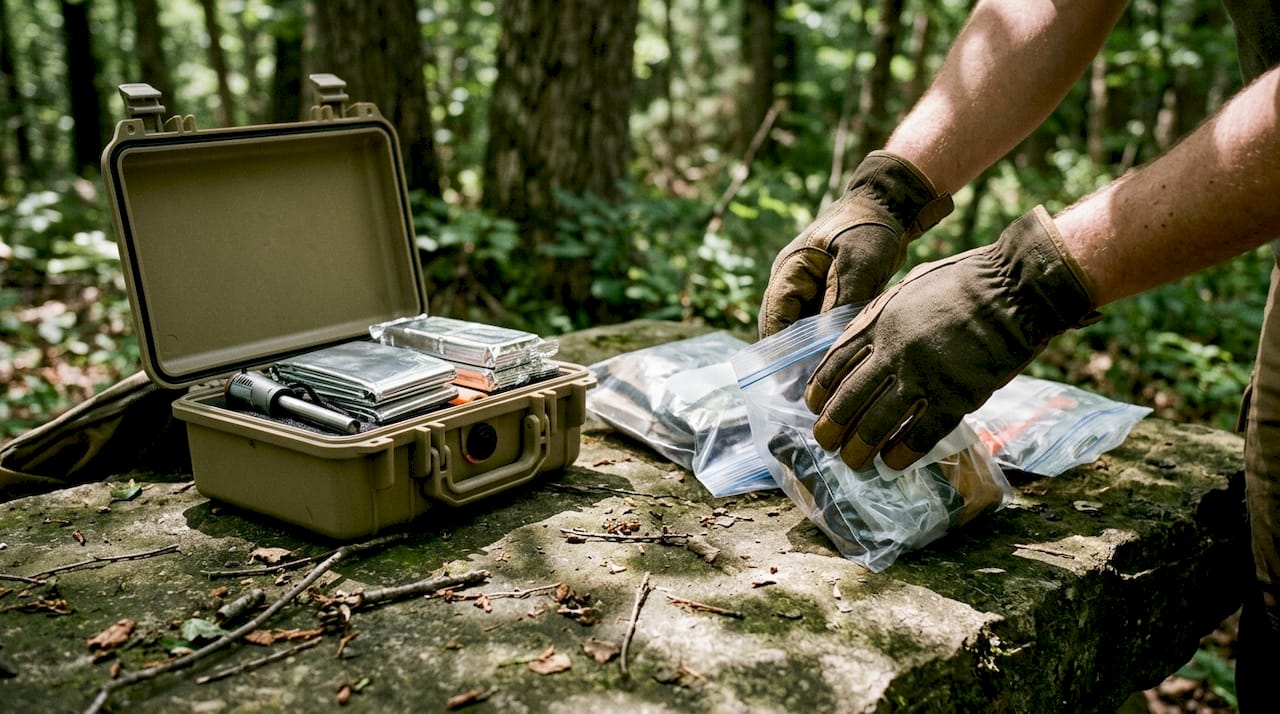
PVC pipe works well for narrow, deep burial in tight terrain. Ammo cans handle impact and rough handling better, but they rust if the seal fails. Hard cases offer the best interior protection but are bulkier to conceal. Each has a place depending on your site conditions and budget.
Contents fall into two categories:
Durable items: Fire starters, fixed-blade knives, paracord, water filters, maps, compass, cash, and a basic first aid kit
Consumable items: Freeze-dried food, water purification tablets, batteries, medications, and fuel canisters
Preparation matters as much as what you pack. Apply corrosion inhibitors to all metal items. Use oxygen absorbers inside the container to slow degradation of food and organic materials. Most cache containers are not waterproof on their own, so pairing vacuum-sealed bags inside the container with a professional-grade sealant on all seams is the standard approach for long-term protection.
Pro Tip: Double-bag every consumable item in heavy-duty vacuum-sealed bags before placing it in the container. Then seal the container’s lid threads with plumber’s tape and a bead of silicone sealant. This dual-layer protection keeps moisture out even when the outer container takes on water.
Each cache should hold at least 72 hours of essential survival supplies to give you time to replan and adapt if your route changes or you face unexpected delays.
How should you space and distribute caches along your route?
Cache spacing follows a clear rule: stage caches at 2-day travel intervals along your bug-out route. Two days of hard travel is roughly the point where fatigue and resource depletion start to compound. A cache at that interval lets you rest, resupply, and reassess before pushing forward.
Distribution strategy goes beyond spacing. The PACE system, which stands for Primary, Alternate, Contingency, and Emergency, gives you a framework for covering every route variant. Cache placement along every route variant is not optional. A cache that sits one day off your actual route is effectively useless when you are moving fast under stress.
The Triangle Distribution Method adds geographic resilience. Instead of placing all your caches in a straight line, you position them at the three points of a triangle that covers your operational area. This protects you if one site is compromised by flooding, discovery, or a route change. Distributing caches across multiple locations using the Triangle or 4-Direction method directly reduces the risk that a single loss wipes out your resupply network.
Here is how the two main distribution frameworks compare:
Method | Best use case | Key advantage |
Linear (PACE) | Fixed bug-out routes with clear start and end points | Ensures coverage at every route variant |
Triangle Distribution | Uncertain routes or multi-directional threat scenarios | Geographic redundancy across a wider area |
The biggest mistake preppers make is concentrating resources at one location. One flood, one curious hiker, or one wrong turn eliminates your entire reserve. Spread the risk.
What maintenance routines keep your caches viable?
A cache you buried two years ago and never checked is not a resource. It is a gamble. Active inspection at least once or twice yearly is the standard recommendation for keeping caches functional. That frequency catches seal failures, moisture intrusion, and expired consumables before they become a crisis.
Each inspection visit should cover the following tasks:
Check all container seals and reseal any that show wear or cracking
Replace oxygen absorbers, which lose effectiveness over time
Rotate perishable food and medications that are approaching expiration
Inspect for water intrusion, rust on metal items, and pest damage
Confirm the site is undisturbed and that your navigation references still match the terrain
Maintaining a physical cache log is not optional. Record the date of each visit, what you replaced, and the current condition of the container. Keep this log in a secure location separate from the cache itself.
Pro Tip: Tie your annual cache inspection to a fixed calendar event, such as the first weekend of april or october. Pairing it with a routine activity makes it harder to skip and easier to remember without relying on digital reminders.
Neglecting maintenance has a compounding cost. A failed seal in year one means ruined food, corroded tools, and a cache that provides nothing when you need it most. The time invested in a yearly check is a fraction of the cost of restocking a destroyed cache.
How to plan, build, and conceal your caches for maximum reliability?
Site selection is the foundation of a reliable cache. Good sites share four traits: stable terrain that drains well, reasonable access year-round, low foot traffic, and proximity to a permanent natural landmark you can navigate to without GPS.
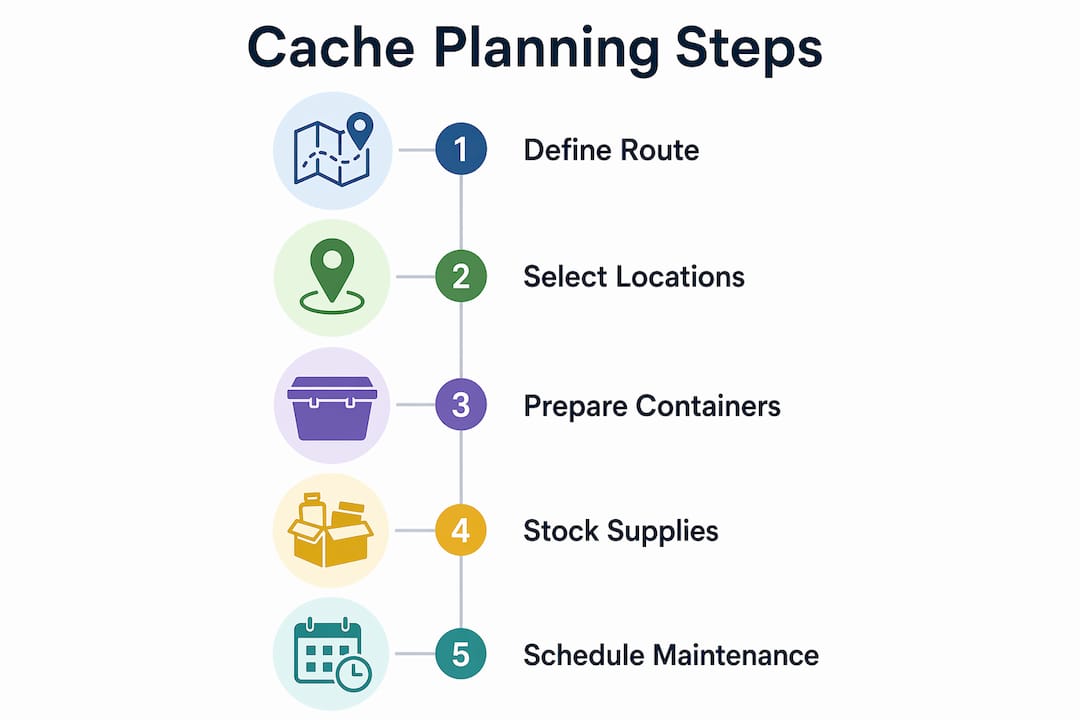
Follow these steps when building a new cache:
Select the site. Choose well-drained ground away from flood plains and frost heave zones. Avoid areas near trails, roads, or structures that attract human activity.
Prepare the container. Seal all seams, pack contents with oxygen absorbers and corrosion inhibitors, and vacuum-seal every consumable item.
Bury at the correct depth. Cache burial depth should be 18–24 inches in moderate climates and deeper than the frost line in cold climates. Shallow burial risks frost heave and accidental discovery.
Document the location. Draw a hand-written range card with compass bearings from at least two permanent landmarks. Use physical landmarks and manual pacing rather than GPS coordinates alone, since digital devices fail during grid outages or EMP events.
Apply concealment. Replace disturbed soil and natural ground cover exactly as you found it. Use the area’s natural “dead space,” such as the base of a large root system or a rock outcropping, to hide any surface disturbance.
Concealment details that matter:
Mark the cache location 100 feet from landmarks with precise compass bearings to reduce accidental discovery
Use mnemonic ciphers or coded range cards so only you can interpret the location data
Avoid placing caches near visually distinctive features like lone trees or rock formations that others already use as landmarks
Never return to a cache site on a predictable schedule, since patterns attract attention
The emergency preparedness checklist from Thrillofit is a useful starting point for building your initial cache inventory before you move to site-specific customization.
Key Takeaways
A survival cache network built on the PACE system, proper container preparation, and regular maintenance is the most reliable way to sustain mobility and resources during an extended bug-out or wilderness emergency.
Point | Details |
Define your route first | Cache placement only works when tied to specific routes and route variants. |
Use dual-layer waterproofing | Vacuum-sealed bags inside a sealed container prevent moisture damage over years. |
Space caches at 2-day intervals | Each cache needs 72 hours of supplies to cover delays and replanning. |
Distribute using PACE or Triangle | Spread caches across multiple sites so one loss does not end your resupply plan. |
Inspect once or twice per year | Check seals, rotate perishables, and update your cache log on every visit. |
Why most preppers get cache planning backwards
Most people I talk to start with the gear and work backward to the plan. They buy a waterproof case, fill it with supplies, and then look for somewhere to bury it. That sequence produces a buried box, not a cache network.
The planning has to come first. You need to know your routes, your realistic travel pace, and the terrain conditions in every season before you pick a single site. I have seen well-intentioned caches placed in spots that flood every spring or sit so close to a popular trail that discovery was inevitable. The gear inside was good. The planning was not.
The other mistake I see constantly is treating cache retrieval as something you will figure out when the time comes. Practice it. Walk to your cache sites without GPS. Use your range cards under time pressure. The stress of a real emergency degrades fine motor skills and memory. If you have not practiced the retrieval process, your documentation system will feel unfamiliar exactly when you need it to be automatic.
Start with two or three caches on your primary route. Get the process right before you scale. A small network you maintain well beats a large one you neglect. The wilderness self-rescue skills that complement a cache plan are just as worth practicing as the caching itself.
— S
Gear up with Thrillofit for your cache builds
Building a reliable cache network starts with the right gear, and that means knowing what holds up over years of burial and what fails at the worst moment.

Thrillofit covers the full range of survival gear suited for cache inventories, from durable water filtration tools to compact fire-starting kits built for long-term storage. The site’s survival gear guides cut through the noise and point you toward equipment that actually performs in the field. Whether you are stocking your first cache or expanding an existing network, Thrillofit’s preparedness resources give you the product knowledge and skill context to build with confidence.
FAQ
What is the purpose of a survival cache?
A survival cache pre-positions essential supplies along your route so you can travel light and resupply as you move. The goal is to support extended mobility without carrying excessive weight from the start.
How deep should you bury a survival cache?
Bury caches 18–24 inches deep in moderate climates and below the frost line in cold climates. Always choose well-drained ground to prevent water intrusion and frost heave damage.
How often should you inspect a buried cache?
Inspect each cache at least once or twice per year. Check container seals, replace oxygen absorbers, rotate perishables, and confirm the site is undisturbed on every visit.
What is the PACE system in cache planning?
PACE stands for Primary, Alternate, Contingency, and Emergency. It is a framework for placing caches along every route variant so you have a resupply option regardless of which path you take.
What should you never store in a single cache location?
Never store all your resources in one location. Distributing supplies across multiple sites using the Triangle or PACE method protects your network if one cache is flooded, discovered, or destroyed.
Recommended
Comments