

How to Build a Shelter: Survival Guide for Outdoors
- Wesley Coldwell
- 4 days ago
- 9 min read

TL;DR:
Building an effective shelter depends on choosing a site with good drainage, wind protection, and stable ground.
Using properly sized materials and layering debris shingle-style ensures durable, waterproof roofing and insulation.
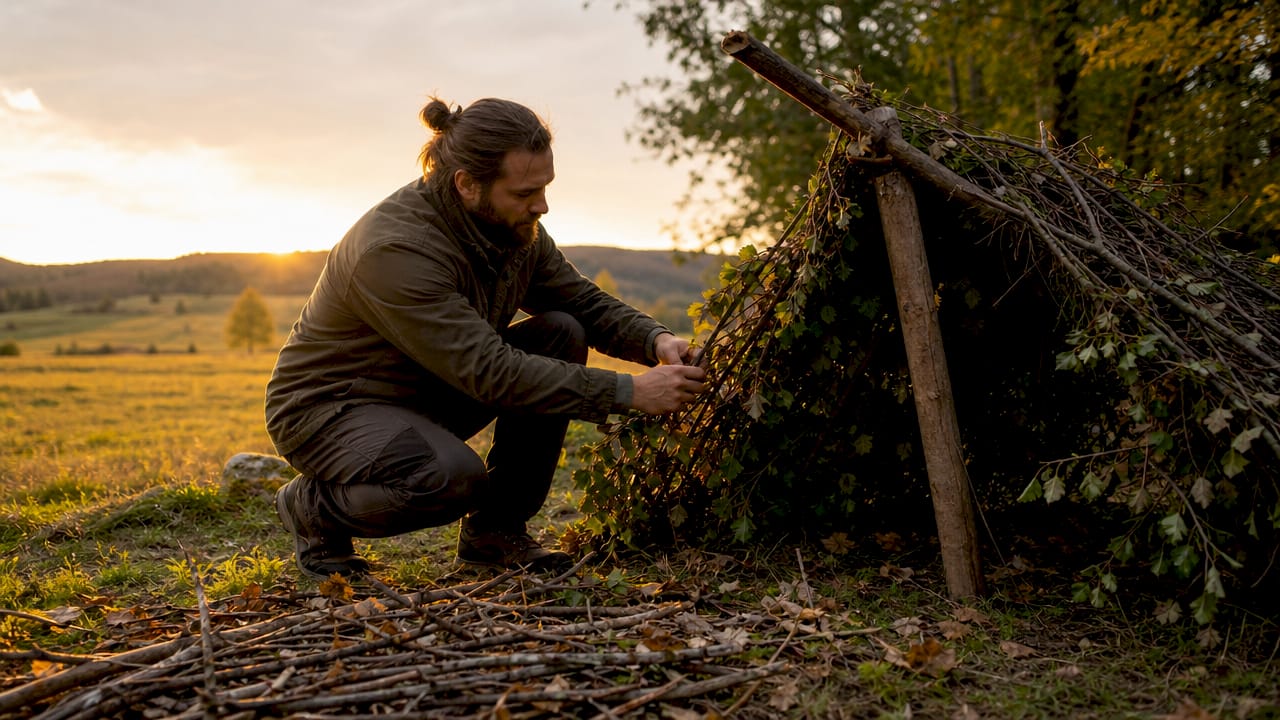
Building a shelter is the act of constructing a protective structure from natural or available materials to shield yourself from wind, rain, cold, and heat. Knowing how to build a shelter ranks among the most critical survival skills you can develop, whether you are a weekend camper, a trail hiker, or someone caught in an unexpected emergency. The difference between a good shelter and a poor one comes down to three things: site selection, materials, and insulation technique. This guide covers all three in practical, step-by-step detail so you can build confidently in the field.
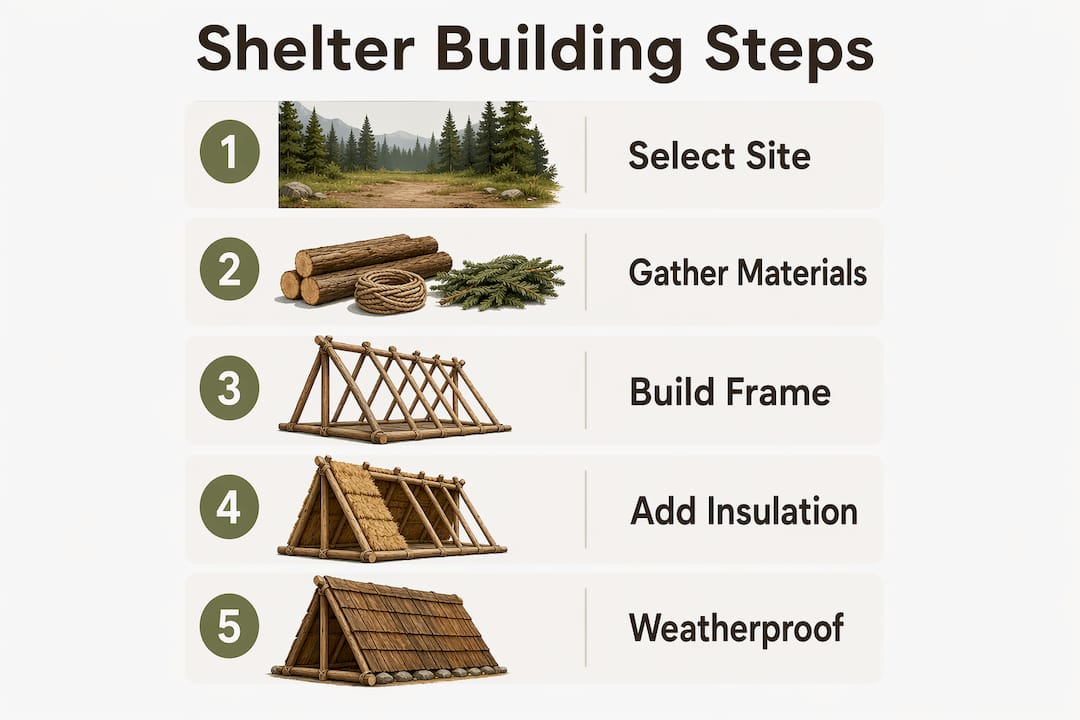
How to select the best site for building an outdoor shelter
Site selection is the single most important decision you make before touching a single branch. A poorly chosen site can flood, funnel cold air onto you, or drop a dead limb on your head while you sleep.
Follow these criteria when scouting your location:
Elevation and drainage. Choose ground that sits slightly higher than the surrounding terrain. Avoid flood zones and low-lying valleys where cold air settles overnight. Even a gentle slope of a few degrees drains water away from your sleeping area.
Wind protection. Position your shelter entrance away from the prevailing wind. A natural windbreak like a rock face, dense brush, or a fallen log on your windward side cuts heat loss dramatically.
Overhead hazards. Look up before you build. Dead branches, called “widow makers” by experienced woodspeople, can fall without warning. Avoid building under dead trees or near unstable rock formations.
Material proximity. The best site sits close to abundant leaves, pine needles, bark, and branches. Hauling insulation materials long distances wastes energy you cannot afford to lose in a survival situation.
Terrain stability. Test the ground by pressing your heel firmly into the soil. Soft, waterlogged ground loses heat faster and offers poor structural support for your ridgepole anchors.
Pro Tip: Spend five minutes walking a 50-foot radius around your chosen spot before committing. You will almost always find a better option within that circle.
A site that checks all five boxes above gives your shelter the best possible foundation before you build a single component.
What materials and tools do you need for shelter construction?
Gathering the right materials before you start building saves time and prevents structural failures mid-build. The table below covers the core components of a debris hut or lean-to.
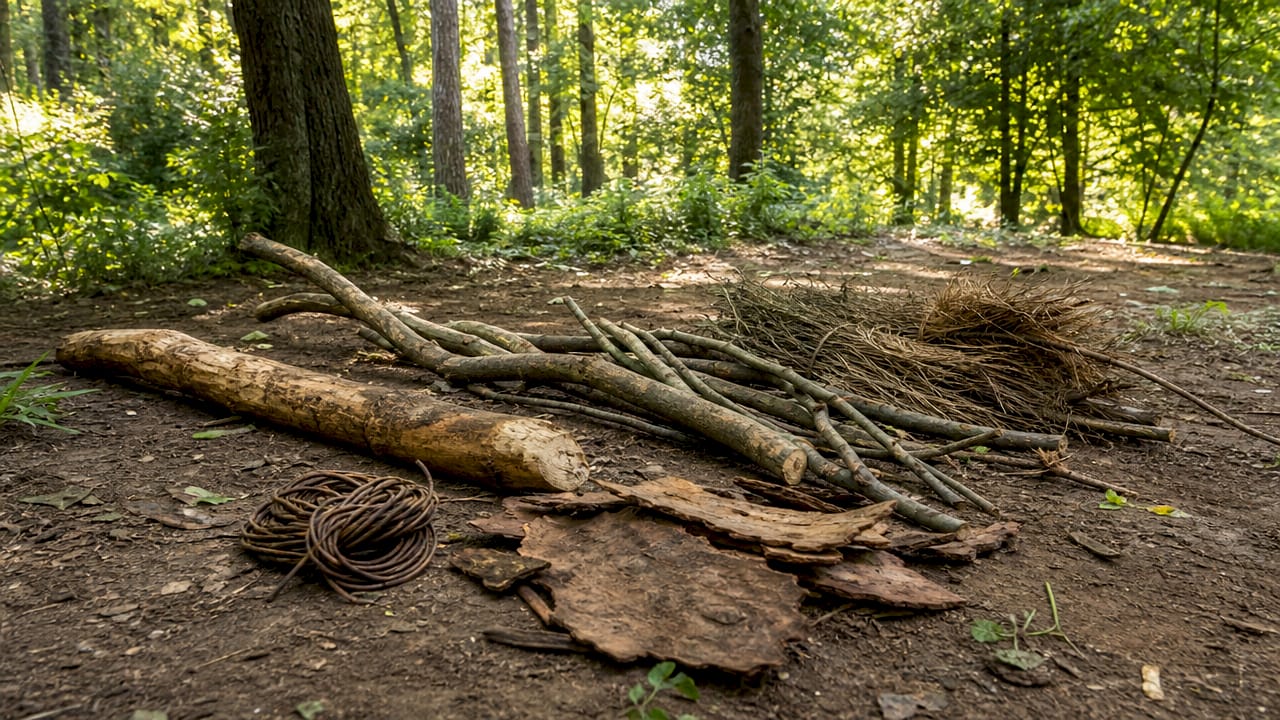
Material / Tool | Specification | Purpose |
Ridgepole | 9–12 feet long, wrist-thick or thicker | Main structural spine of the shelter |
Rib branches | 4–6 feet long, thumb-thick | Side supports leaning against ridgepole |
Insulation debris | Dry leaves, pine needles, grass, bark | Roof and wall insulation layers |
Ground bedding | Dry leaves or pine boughs, 4–8 inches thick | Insulates body from ground heat loss |
Cordage (optional) | Paracord, natural vine, or bark strips | Lashing ridgepole to support fork |
Cutting tool (optional) | Fixed-blade knife or folding saw | Trimming branches to length |
Tarp (optional) | Any waterproof sheet | Outer weatherproofing layer |
Ridgepole dimensions typically run 9–12 feet, with ribs spaced 12–18 inches apart for a debris hut. That spacing keeps the structure rigid without requiring excessive branch volume.
For insulation, dry material outperforms wet material by a wide margin. Wet debris transmits cold and reduces insulation effectiveness. When your debris is damp, increase your insulation thickness by roughly 50% and use evergreen boughs on the outer layer to shed water.
Pro Tip: Gather three times more insulation material than you think you need. Debris compresses and settles after you pack it, so volume is your best friend.
Matching materials to their best use produces stronger results. Thatch works well for roofing, bark panels work for walls, and mud seals gaps. Using one material for every purpose weakens the overall structure.
Step-by-step instructions for building a debris hut or lean-to
These two shelter types cover most outdoor scenarios. A lean-to suits mild weather and quick builds. A debris hut handles near-freezing temperatures and extended stays.
Building a lean-to
Set the ridgepole. Find a ridgepole 6–10 feet long and prop it between two trees or forked branches at a height of 3–4 feet. Lash it securely with paracord or natural cordage if available.
Add ribs. Lean branches against the ridgepole at a 45-degree angle on one side. Space ribs 4–6 inches apart for better structural integrity against wind. Closer spacing also holds debris roofing more effectively.
Layer the roofing debris. Start at the bottom and work upward, overlapping each layer like roof shingles. Shingle-style layering from bottom to top prevents water from running under the material and soaking through.
Build the ground bed. Pile dry leaves, pine needles, or grass at least 4–6 inches thick on your sleeping area. Heat loss through the ground exceeds heat loss through the air, so this step is not optional.
Add a windbreak wall. Stack branches and debris on the open sides to reduce wind penetration. Even a loose wall cuts convective heat loss significantly.
A beginner lean-to shelter commonly takes 2–4 hours to complete. Budget that time before darkness falls.
Building a debris hut
Anchor the ridgepole. Prop one end of a 9–12 foot ridgepole in the fork of a standing tree or on a stump about 3 feet off the ground. The other end rests on the ground.
Frame the ribs. Lean branches along both sides of the ridgepole at roughly 12–18 inch intervals, creating a ribcage shape. The interior should be just wide enough for your shoulders and just long enough for your body.
Pack the debris roof. Pile leaves, grass, and pine needles over the rib frame. Debris huts require at least 2 feet of insulation on all sides for near-freezing temperatures, and 3 feet at 20°F.
Prepare the ground bed. Fill the interior floor with 6–8 inches of dry, compressible debris. This layer is your primary defense against ground cold.
Seal the entrance. Stuff a large bundle of leaves or a backpack into the doorway after you crawl inside. This plug traps your body heat inside the small interior.
Pro Tip: Size your debris hut interior to fit your body with about 6–8 inches of clearance on each side. A shelter that is too large cannot be warmed by body heat alone.
How to insulate and weatherproof your shelter
Insulation is where most shelters succeed or fail. The physics are simple: trapped air holds heat, and more dry debris means more trapped air.
Key insulation principles to follow:
Roof and wall depth. Maintain at least 2 feet of loose debris on the roof and sides in temperatures near freezing. At 20°F, push that to 3 feet.
Ground bed depth. Use a minimum of 4 inches of dry bedding. In cold environments, ground insulation should reach 6–8 inches. Ground contact is the biggest heat-loss pathway in any improvised shelter.
Loose, not compressed. Insulating debris works by volume, not by compression. Loose, thick dry leaves trap air far better than tightly packed material.
Shingle overlap. Always layer roofing material from the bottom up, overlapping each row. This mimics how roof shingles work and channels water away from the interior.
Daylight test. After completing your roof, crawl inside and look for pinpoints of light. A final daylight check reveals gaps caused by shifting materials. Add debris anywhere you see light.
Condition | Roof insulation depth | Ground bed depth |
Mild (above 40°F) | 12 inches | 4 inches |
Near freezing (32–40°F) | 2 feet | 6 inches |
Cold (below 20°F) | 3 feet | 8 inches |
For wet conditions, pine boughs on the outer layer act as a natural water-resistant barrier. Layer them with the needles pointing downward so water runs off rather than soaking in.
What are the most common shelter-building mistakes?
Even experienced builders make predictable errors. Knowing them in advance saves you from a cold, wet night.
Building too large. Ideal interior dimensions sit about 6–8 inches wider and taller than your body. A shelter that is too spacious cannot be warmed by body heat alone. Smaller is always warmer.
Skipping ground insulation. Many builders focus entirely on the roof and ignore the floor. Ground contact pulls heat from your body faster than cold air does. Always build the ground bed first.
Ignoring debris settling. Debris shifts when you crawl in and out. A shingle-layered roof with a cross-branch lattice underneath resists settling far better than loosely piled material.
Choosing a hazardous site. Wind-exposed ridgelines, flood-prone valleys, and sites under dead trees all create dangers that no amount of good construction can fix.
Skipping the final check. Crawl inside before you sleep and run the daylight test. Fix every gap you find. A single overlooked hole can drop your interior temperature by several degrees overnight.
“The shelter that keeps you alive is not the most impressive one. It is the smallest, most insulated one you could build with what was around you.” This principle holds true across every survival shelter design, from debris huts to snow trenches.
Pair your shelter with a reliable fire-starting skill and you cover the two most critical survival priorities in any outdoor emergency.
Key Takeaways
Building an effective shelter requires a well-drained site, correctly sized interior, and at least 2 feet of dry debris insulation on the roof with 4–8 inches on the ground.
Point | Details |
Site selection first | Choose elevated, well-drained ground away from wind, flood zones, and overhead hazards. |
Size the interior small | Keep interior dimensions 6–8 inches larger than your body to retain body heat effectively. |
Insulate the ground first | Ground contact loses heat faster than air exposure; build a 4–8 inch dry debris bed before anything else. |
Layer roofing shingle-style | Work bottom to top with overlapping debris rows to channel water away from the interior. |
Always run the daylight test | Crawl inside after roofing and add debris wherever light enters to seal gaps before sleeping. |
What field experience actually teaches about shelter building
The first time I built a debris hut in the field, I made it too big. I thought more space meant more comfort. What I got instead was a cold, drafty box that my body heat could not warm. That single mistake taught me more about shelter physics than any manual ever did.
The second lesson came from ignoring the ground. I had a beautiful roof, two feet of debris packed tight, and I was still shivering by midnight. The forest floor pulled heat straight through my thin leaf bed. After that, I always build the ground bed first, before a single rib goes up.
Site scouting is where most people rush. Spending an extra ten minutes finding a spot with natural windbreaks, good drainage, and nearby debris pays back every minute in warmth and dryness. I have walked past a dozen “good enough” spots to find the right one, and I have never regretted it.
Practice matters more than gear. Building a shelter in your backyard or a local park before you need one in an emergency is the best preparation you can do. The perfect campsite guide from Thrillofit is a solid companion resource for understanding site dynamics before you head into the backcountry.
— S
Thrillofit has more survival skills waiting for you
Shelter building is one piece of a larger survival skill set. Knowing how to read terrain, start a fire, and treat injuries in the field rounds out your preparedness in a real way.

Thrillofit covers all of it. From wilderness survival guides to gear recommendations and step-by-step outdoor skills, the site is built for people who take their time outdoors seriously. Whether you are a first-time camper or a seasoned bushcrafter, you will find practical, field-tested content that goes beyond the basics. Check out the full library at Thrillofit and keep building your skills one outing at a time.
FAQ
What is the easiest shelter to build for beginners?
A lean-to is the easiest shelter for beginners. It requires a single ridgepole, angled rib branches, and layered debris roofing, and most beginners complete one in 2–4 hours.
How much insulation does a debris hut need?
A debris hut needs at least 2 feet of loose debris on all sides near freezing temperatures, and 3 feet at 20°F. Ground bedding should be 4–8 inches of dry, compressible material.
Why does shelter size matter for warmth?
A shelter sized too large cannot be warmed by body heat alone. Ideal interior dimensions sit roughly 6–8 inches wider and taller than your body to trap and hold heat effectively.
How do I stop my shelter roof from leaking?
Layer roofing debris from the bottom up in overlapping rows, like roof shingles. After finishing, crawl inside and look for daylight. Add debris to every gap you find before sleeping.
What is the best ground insulation for a survival shelter?
Dry leaves, pine needles, and grass make the best ground insulation. Pile them at least 4 inches thick in mild conditions and 6–8 inches thick in cold environments to block ground heat loss.
Recommended

Comments