

Adventure Travel Guides for Outdoor Enthusiasts

TL;DR:
Planning safe outdoor adventures in the U.S. requires thorough preparation, including permits, gear, and emergency plans. It is essential to match activities to regions and seasons, schedule rest days, and carry activity-specific equipment while securing insurance and verified permits. Developing an emergency plan with your contact and mastering core wilderness skills significantly increases safety and trip success.
This guide delivers a complete U.S.-focused planning blueprint covering safety, gear, logistics, itinerary design, and emergency preparedness — everything you need to get into the backcountry and back out safely. Written by Author S for Thrillofit, it’s built for outdoor enthusiasts and survival hobbyists who want practical, field-tested advice, not generic tourism tips.
Three things to do right now:
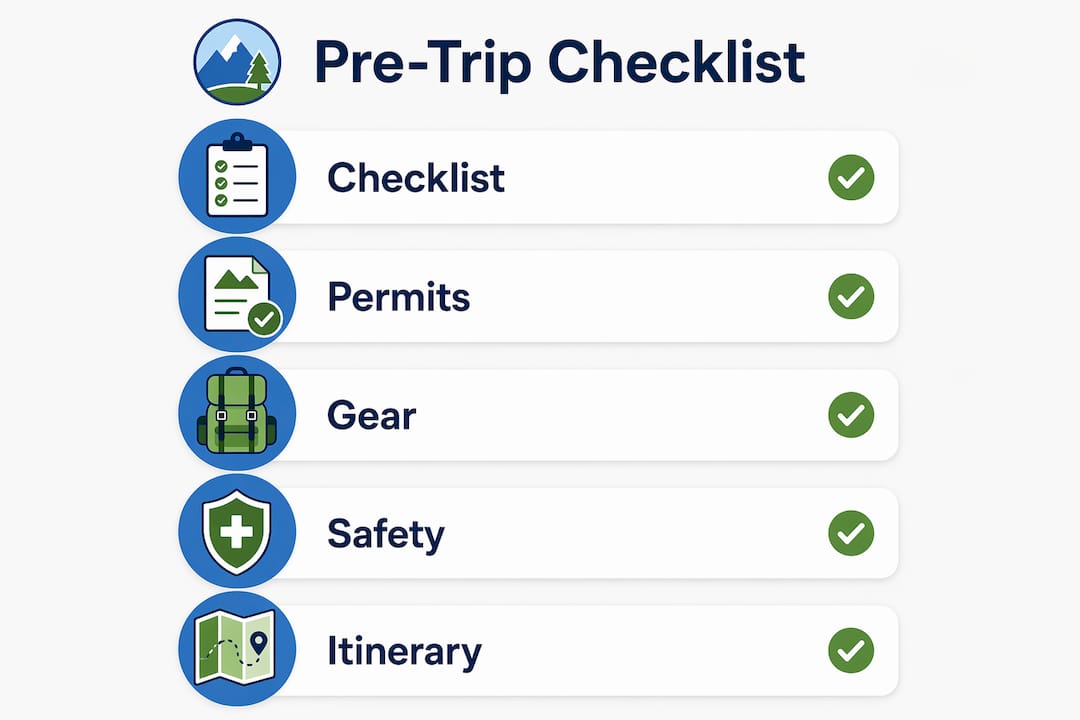
Print or screenshot the pre-trip checklist in the next section — it takes ten minutes and catches the mistakes that ruin trips.
Jump to the Safety & Emergency Preparedness section before you finalize any route; insurance and comms decisions belong at the start of planning, not the end.
Use the itinerary templates in Section 4 to draft your first realistic schedule, including rest days.
Table of Contents
What should your pre-trip checklist include?
Item | Check |
Government-issued ID + passport (6+ months validity for international) | ☐ |
Permits printed and stored offline | ☐ |
Prescription medications (full supply + 2-day buffer) | ☐ |
eSIM activated or local SIM inserted | ☐ |
PLB or satellite messenger registered and charged | ☐ |
Portable battery bank (fully charged) | ☐ |
Small cash reserve | ☐ |
Offline maps downloaded | ☐ |
Emergency contacts uploaded to phone and printed | ☐ |
Emergency Contact Template (copy into your notes app or print):
Permit reminder: For high-demand NPS and USFS sites, permit windows often open 6 months ahead. Confirm your specific permit release date at recreation.gov at least two weeks before that window opens — not the day of.
How do you pick the right U.S. region and season?
Match your primary activity to the region first, then check the seasonal hazards for that window.
Activity-to-region quick reference:
Hiking/backpacking: Sierra Nevada (CA), Cascades (WA/OR), Appalachian corridor (ME to GA), Colorado Rockies
Alpine/ski mountaineering: North Cascades, Tetons, Colorado 14ers (May–July summit windows)
Desert exploration: Moab/Canyonlands (UT), Sonoran Desert (AZ), Big Bend (TX) — best October through March
Paddling/river: Buffalo National River (AR), Boundary Waters (MN), Salmon River (ID), Green River (UT)
Rock climbing: Red River Gorge (KY), Joshua Tree (CA), Yosemite Valley (CA), Rifle (CO)
Backcountry fishing: Kenai Peninsula (AK), Yellowstone backcountry (WY), Boundary Waters (MN)
Seasonal hazards to plan around:
Heat and wildfire season (June–September in the West): check active fire maps and air quality before committing to a route.
Winter avalanche risk (December–April in alpine zones): AIARE Level 1 training is the minimum before traveling in avalanche terrain.
Monsoon and flash flooding (July–September in the Southwest): afternoon thunderstorms can turn slot canyons lethal in minutes.
Popular NPS permit systems like Yosemite’s Half Dome cables lottery and the Havasupai permit open months in advance. Basing yourself in a secondary beta city near your target area — Moab instead of Salt Lake City, Ashland instead of Portland — cuts costs and puts you closer to trailheads.
How do you design an itinerary that doesn’t burn you out?
Treat your itinerary as a flexible draft, not a contract. Veteran travelers consistently find that less-scheduled plans with built-in recovery time produce better trips than packed-to-the-minute schedules.
Sample itinerary frameworks:
Trip Type | Structure | Daily Distance |
Weekend fastpack | Day 1: drive + moderate mileage in; Day 2: summit/objective + out | 8–15 mi / moderate elevation gain |
5–7 day basecamp | Days 1–2: establish camp; Days 3–5: day trips; Day 6: rest; Day 7: out | 5–10 mi day trips |
Multi-day point-to-point | Shuttle car to endpoint first; 10–14 mi/day with one zero day mid-route | 10–14 mi / significant elevation gain |
Pro Tip: Schedule at least one full rest day for every 5–7 days of activity. Use it for gear maintenance, route scouting, or simply eating and sleeping. Skipping this is the single fastest way to turn a great trip into a miserable one.
Are you actually prepared for a backcountry emergency?
Buy specialized travel and evacuation insurance before any backcountry or international trip. A helicopter evacuation from a remote wilderness area can cost tens of thousands of dollars; travel insurance typically runs only a few dollars a day, making the math straightforward.
Emergency plan template:
Leave a full itinerary (route, campsites, exit date) with a trusted contact at home.
Agree on a “trigger time” — if they haven’t heard from you by X date, they call local authorities.
Know the county sheriff’s number for your trailhead area, not just 911.
Identify the nearest hospital and helicopter landing zone on your map before you leave.
Communications options:
Cell + eSIM: adequate for frontcountry and areas with coverage; useless in most backcountry.
Satellite messenger (Garmin inReach, SPOT): two-way messaging, SOS capability, tracking — the best all-around backcountry option.
Personal Locator Beacon (PLB): one-way SOS only, no subscription fee, register free with NOAA — best as a backup or budget option.
First-aid priorities in the field: stop major bleeding first (tourniquet or direct pressure), then manage airway and breathing, treat for shock (warmth, position, fluids if conscious), stabilize fractures before moving the patient, and make evacuation decisions early — waiting too long is the most common mistake.
A backcountry first aid course through NOLS or a Wilderness First Responder (WFR) program is the single highest-return investment you can make before a remote trip.
Which wilderness skills do you need before going solo?
Master map-and-compass navigation, water sourcing and treatment, and emergency shelter construction before any solo or remote backcountry travel. GPS fails; batteries die; these skills don’t.
Core skill checklist:
Topographic map reading and contour interpretation
Compass bearing and triangulation
Pace-and-time estimation for distance tracking without GPS
Water treatment: filtration (Sawyer Squeeze, BeFree), chemical treatment (Aquatabs), and boiling as backup
Emergency shelter: tarp rigging, debris hut construction, bivy use
Signaling for rescue: whistle (three blasts), signal mirror, ground-to-air patterns
For hands-on training, NOLS wilderness courses and REI Co-op Adventures navigation workshops are strong starting points. Run a local practice drill: navigate a 2-mile loop using only a topo map and compass, no phone. Do it twice before your first solo trip. For beginner trail skills, Thrillofit’s hiking guide covers the fundamentals in plain language.
How should you pack for different outdoor trip types?
Pack for your planned activities, not for every possible worst case. Over-packing reduces mobility and increases injury risk on technical terrain.
Packing lists by trip type:
Fastpack/dayhike: 20–30L pack, rain shell, first-aid kit, 2L water capacity, navigation tools, emergency bivy, snacks.
Multi-day backpack: 50–65L pack, shelter system, sleep system (bag + pad), 4-day food supply, water filter, repair kit, bear canister where required.
Alpine/winter: insulated layers, crampons, ice axe, avalanche safety kit (beacon, probe, shovel), goggles, high-calorie food.
Paddle/river: dry bags, PFD, throw rope, wetsuit or drysuit by season, repair kit, waterproof comms.
Car-camping basecamp: comfort items allowed — but still keep a packed “go bag” ready for day hikes.
Weight-saving rules:
Choose multi-use camp gear — a tarp that serves as both shelter and rain catchment, a pot that doubles as a bowl.
Layer clothing instead of packing separate garments for every temperature scenario.
Cut shelter weight with a cuben-fiber tarp + bivy instead of a full tent on fair-weather routes.
Pro Tip: Lay everything out before packing, then remove one-third of it. Whatever you almost left behind is what you’ll actually use.
How do you get permits and stay safe around wildlife?
Permit lookup in three steps:
Go to recreation.gov for federal lands (NPS, USFS, BLM) or your state’s parks portal.
Have your dates, group size, entry point, and preferred campsite zones ready before the window opens.
Set a calendar alert for the exact release time — popular permits sell out in minutes.
Wildlife safety checklist:
Situation | Action |
Bear country | Hang food 10 ft up / 4 ft from trunk, or use a certified bear canister |
Snake encounter | Freeze, identify, back away slowly — never reach into brush blindly |
Tick exposure | Full-body check within 2 hours of returning to camp; remove with fine-tip tweezers |
Large mammal (moose, mountain lion) | Make yourself large, speak firmly, back away — never run |
Leave No Trace essentials: pack out all waste, use a cat hole (6 inches deep, 200 feet from water) for human waste, and follow current fire restrictions posted at the trailhead. Campfire violations on federal land carry fines and can result in permit bans.
How do you handle access, vehicles, and resupply?
Vehicle and access prep:
Check tire pressure and tread before any dirt-road approach; carry a full-size spare.
Verify road conditions with the relevant ranger district — many forest roads close seasonally or after storms.
Confirm trailhead parking rules (day-use vs. overnight permits) and display required passes (America the Beautiful, state day-use passes).
For RV-supported basecamp trips, CampGazer is a useful tool for checking campsite availability and planning vehicle-based access before you commit to a route.
Resupply options:
Mail drops to post offices or outfitter stores work well on long routes (PCT, CDT sections).
Local grocery and gear stores in gateway towns handle most 3–7 day resupply needs.
Camping food planning matters as much as gear — calorie density per ounce is the metric that counts.
Arrive at trailheads during daylight. Late-night arrivals on forest roads increase the risk of wildlife collisions and navigation errors on unfamiliar roads.
What does an outdoor trip actually cost?
Cost Category | Typical Range |
Transport (gas/flights) | $50–$200 |
Permits and fees vary | |
Daily food costs for backcountry vary | |
Gear rental or replacement costs vary | |
Travel/evacuation insurance costs vary | |
Emergency evacuation costs can be very expensive |
The insurance row is the one that changes the math. Travel and evacuation insurance typically costs only a few dollars a day and covers helicopter evacuation, which can otherwise cost tens of thousands of dollars uninsured. When selecting a policy, confirm it covers: emergency medical, helicopter evacuation, search-and-rescue costs, and your specific activities (many standard policies exclude mountaineering or whitewater above a certain class).
Which apps and agencies should you use before a U.S. trip?
Apps worth having:
Gaia GPS or CalTopo: offline topo maps and route planning — download maps before you lose signal.
Weather.gov or Mountain Forecast: NOAA-sourced forecasts by elevation, not just town.
Garmin Explore or SPOT: companion apps for satellite messenger devices.
iNaturalist: plant and wildlife ID in the field.
Agencies to check before every trip:
NPS: park-specific alerts, permit systems, fire restrictions.
USFS: forest road conditions, dispersed camping rules, fire closures.
NOAA: weather and river/tide forecasts.
CDC: health advisories and vaccination recommendations for international extensions.
U.S. Department of State: travel advisories and STEP enrollment for any international leg.
Device setup reminders: register your PLB with NOAA (free, required by law), activate your eSIM before departure, and upload emergency contacts to your satellite messenger before you leave cell range.
Key Takeaways
Safe, mobile outdoor trips require insurance secured before departure, a filed emergency plan, realistic pacing with rest days, activity-matched gear, and verified permits well ahead of your window.
Point | Details |
Buy insurance first | Travel and evacuation insurance at a few dollars a day covers helicopter evacuation costs that can reach tens of thousands of dollars uninsured. |
File an emergency plan | Leave your full itinerary and a trigger date with a home contact before every backcountry trip. |
Schedule rest days | Build one full rest day per 5–7 days of activity to prevent burnout and preserve flexibility. |
Pack for the trip you’re taking | Activity-matched packing reduces weight, decision fatigue, and injury risk on technical terrain. |
Thrillofit resources | Thrillofit’s gear picks, survival guides, and planning articles give you a practical starting point for any trip type. |
The mistake most outdoor planners make
Most people over-plan the fun parts and under-plan the failure modes. They spend hours choosing a tent and twenty minutes thinking about what happens if someone breaks an ankle on day three. The itinerary gets built around best-case weather, best-case fitness, and best-case permit availability.
The outdoor enthusiasts who consistently have good trips do the opposite. They confirm the exit strategy before they confirm the route. They know which ranger district to call, where the nearest road is, and what their satellite messenger’s SOS sequence actually does. The gear is secondary to that mental framework.
One thing worth doing before your next trip: sit down with your emergency contact and walk them through the plan out loud. Not a text, not a shared document — a conversation. You’ll catch gaps in your own plan that no checklist reveals.
Thrillofit has the guides to get you started
Thrillofit’s library of outdoor adventure guides covers the practical side of backcountry planning that most travel sites skip: survival skills, gear selection, safety drills, and trip-specific checklists built for people who actually go outside.
The gear picks category is a good first stop if you’re building or upgrading a kit. From there, the survival and wilderness skills articles give you the field-knowledge foundation that makes every other piece of gear more useful. Browse the full site at thrillofit.net and find the articles that match your next trip type.
Useful sources and training partners
National Park Service (NPS): park alerts, permit systems, fire restrictions, and wildlife guidelines — check before every NPS trip.
U.S. Forest Service (USFS): forest road conditions, dispersed camping rules, and fire closures by ranger district.
NOAA Weather: elevation-specific forecasts and river/tide data; the most reliable source for backcountry weather planning.
U.S. Department of State: travel advisories and STEP enrollment for international trip extensions.
NOLS (National Outdoor Leadership School): wilderness first aid, WFR, and backcountry leadership courses — the gold standard for field medical training.
American Avalanche Association (AAA): AIARE-certified avalanche courses; required before traveling in alpine terrain December through April.
REI Co-op Adventures: navigation workshops and guided backcountry trips for skill-building in a supervised setting.
When vetting any training provider, confirm they hold current certifications from a recognized body (NOLS, WEMS, or AAA for avalanche) and check that their curriculum matches the terrain you’re planning to travel.
Recommended
Comments